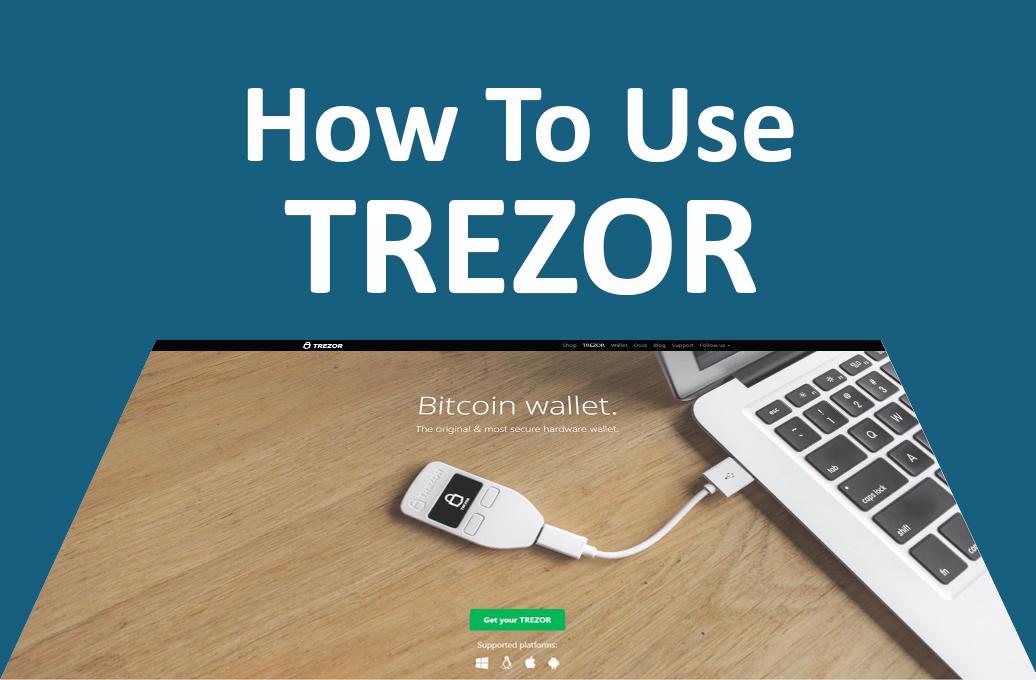
How to Use Trezor Wallet – Step by Step Guide
Trezor is a hardware cryptocurrency wallet from Satoshilabs. Available in white, grey or black and costing around $100, it’s designed to keep your crypto safe by storing your wallet info and signing transactions without transmitting any private data online.
This guide looks at all the essentials you can perform with your Trezor, from setting up to sending and receiving coins.
Looking for safe options to trade your crypto? Try these brokers:
The company was created as a combined effort of financial professionals and experts in web-commerce with the goal of perfecting the online experience for retail traders.

82% of retail investor accounts lose money when trading CFDs with this provider. You should consider whether you can afford to take the high risk of losing your money
Plus500 is a FTSE 250 listed brokerage providing online trading services in CFDs, across 2,000+ securities and multiple asset classes.
Don’t invest unless you’re prepared to lose all the money you invest. This is a high-risk investment and you should not expect to be protected if something goes wrong. Take 2 mins to learn more
1. Setting Up
- Connect your Trezor to your device’s USB slot with the cable provided in the box.
- Go to myTrezor.com and install the extension for your browser. You can use Trezor on Android or an iPhone, or on a Windows or Mac computer.
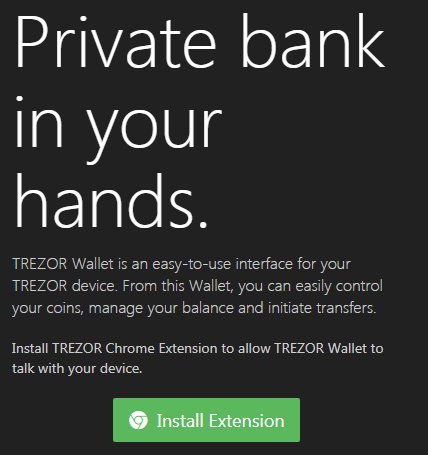 Image source: Trezor
 - Activate the extension and myTrezor will ask you to choose a PIN. On your device, you’ll see nine buttons in a normal 3×3 keypad layout, but the numbers are obscured.
- Check your Trezor’s screen to see which numbers are in which location – it changes every time – and use your device to set your PIN.
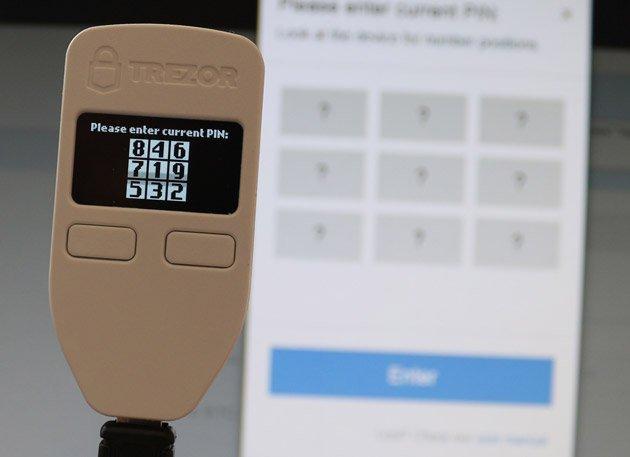 Image source: CoinDesk
 - Your Trezor will now display your 24-word wallet “seed”, one word at a time. You must write this seed down and keep it somewhere very safe: if your Trezor is damaged, stolen, or lost, you can use the seed to rebuild your entire wallet.
Don’t keep the seed in a digital file where it can be hacked!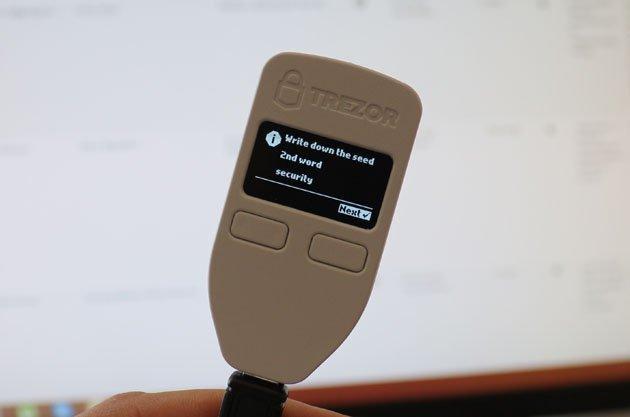
Image source: CoinDesk.
If you want to change your PIN in the future, use the settings option (the cog wheel icon).
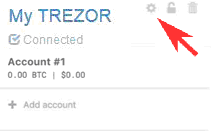
Image source: CoinDesk
You’re all set: your Trezor is ready to send and receive crypto!
2. Receiving Bitcoin
When you buy bitcoins on CoinBase or a similar site, you’ll need your wallet address (also called the “public key”).
You don’t need to connect your Trezor to receive, but you do need to connect it to find your wallet address.
- Connect your Trezor to your computer, Android mobile or iPhone.
- Go to myTrezor.com and click Account #1. You’ll see a list of all transactions performed with this account (which will be blank at first).
- Click the Receive tab.
Your public wallet address is the long string of letters and numbers, or you can scan the QR code if you’re using an Android mobile or an iPhone.
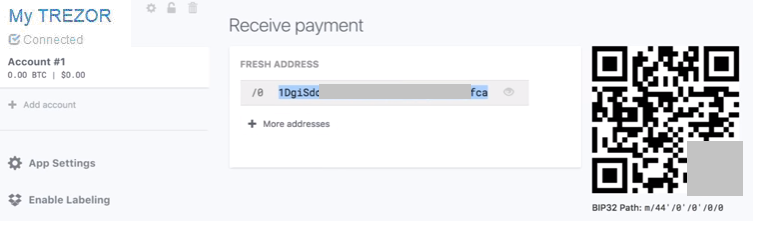
5. Any funds sent to this address will go to your Trezor wallet. Since Bitcoin is a completely virtual currency, you don’t need to connect your device: the blockchain maintains a record of your wallet balance at all times.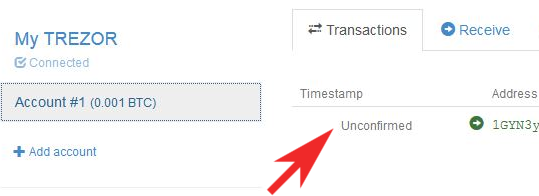
Image source: CoinDesk
When you receive bitcoins, transactions show asUnconfirmed until sufficient nodes have seen the transfer and confirmed that it’s legitimate.
That usually happens within 15 minutes, though it can be longer if the Bitcoin network is very busy!
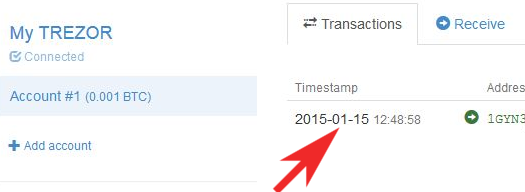
Image source: CoinDesk
3. Sending Bitcoin
To send bitcoins, you must connect your Trezor to your device. You can’t confirm a transaction without your hardware wallet.
- Go to myTrezor.com.
- Connect your Trezor and choose Account #1
- Click the Send tab.
- Enter the address to which you’re sending funds (or copy-paste it, to avoid mistakes). Alternatively, you can scan a QR code.
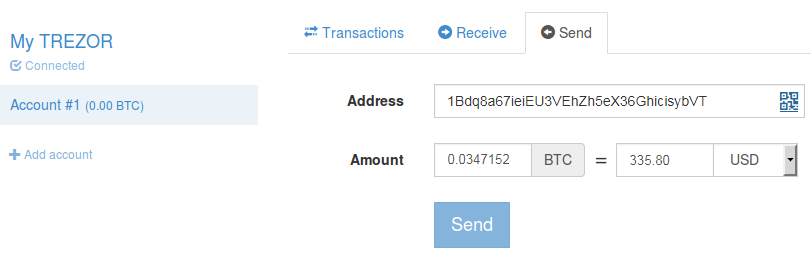
- Enter the amount to send in BTC. The site offers an estimated value based on current Bitcoin prices at CoinDesk.
- There’s an Add Recipient option to send to multiple recipients, if you wish.
- Click Send.
You’ll have to enter your PIN, using a combination of the website and your Trezor, just like when you set up.
Your Trezor displays the transaction details. Check them, then confirm by pressing the right button on your Trezor. If the details are wrong or you wish to cancel, press the left button.
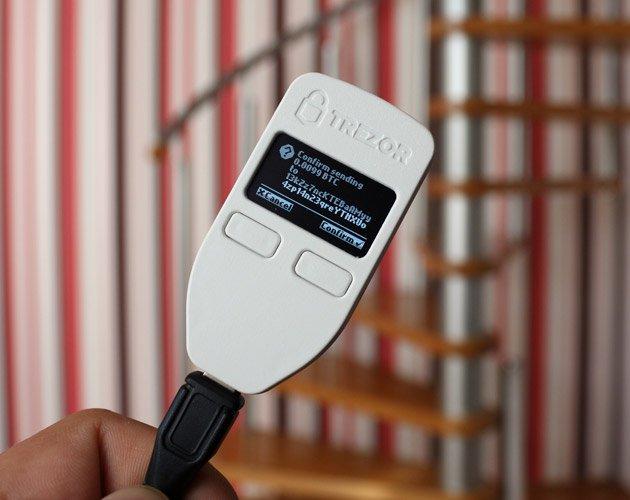 Image source: CoinDesk
And that’s it! Your transaction will appear on myTrezor (in red).
4. Setting Up for Ethereum
Trezor is primarily designed for Bitcoin, so that’s the only currency the myTrezor site offers. However, you can use your hardware wallet to store and send Ethereum and ERC20-compliant tokens.
Rather than build an in-house solution, Trezor uses MyEtherWallet as its interface to the Ethereum blockchain.
-
-
-
-
-
- Go to myetherwallet.com.
- Connect your Trezor to your computer, Android mobile or iPhone.
- Choose Send Ether & Tokens to send, or View Wallet Info to see what’s stored on your Trezor. Don’t create a new wallet: your Trezor is your wallet!

- Click Connect to TREZOR and enter your PIN.
- MyEtherWallet will ask you to confirm exporting your public key. The site needs your key to check the blockchain for transactions, but it’s the public key. Nothing private is transmitted. Click Export.
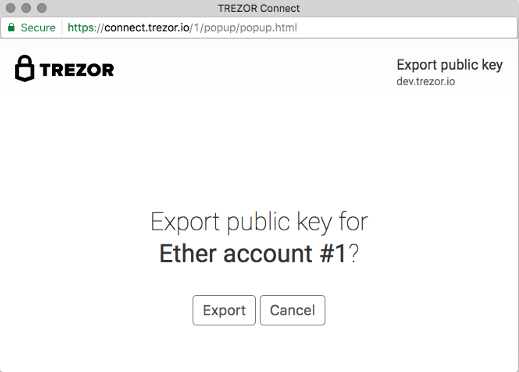
- The site will show you a list of the wallet addresses on your Trezor. Select the one you wish to use and click Unlock to continue.
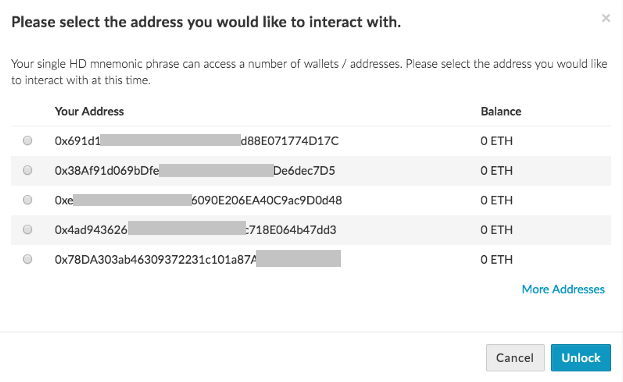
Image source: MyEtherWallet
-
-
-
-
You can receive without plugging in your Trezor, the same as for Bitcoin: just send assets (ether or ERC20 tokens) to the wallet address.
Sending works in a similar way to myTrezor: check out our MyEtherWallet guide for full details!