How to use MyEtherWallet – Step-by-step Guide
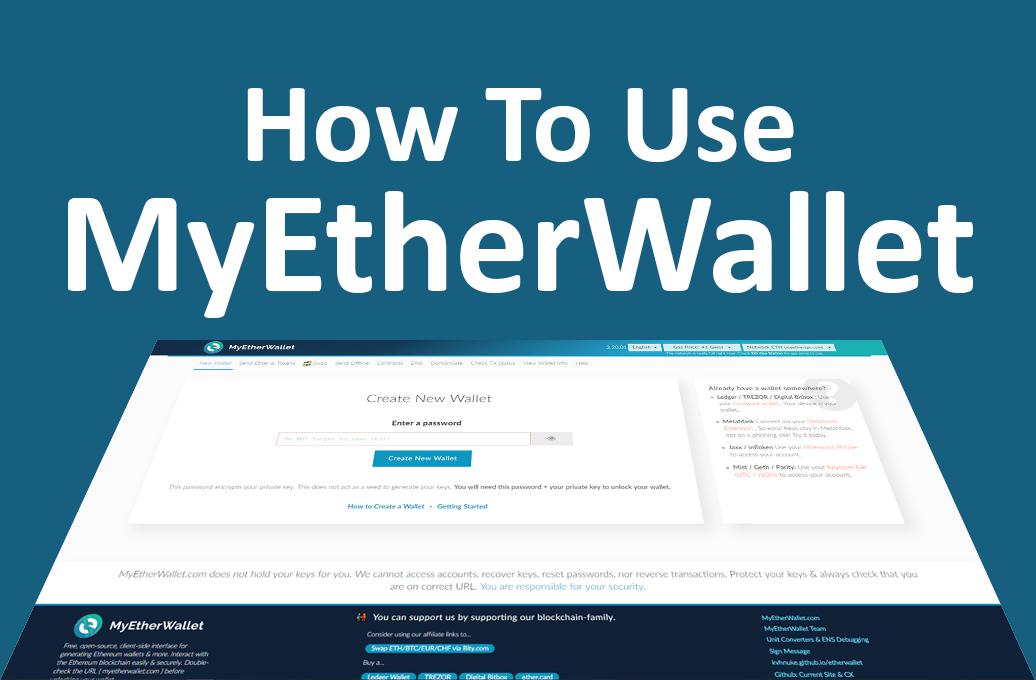
MyEtherWallet is a front end to the Ethereum blockchain. It’s not like most wallet sites because it doesn’t use site accounts or logins: you create and manage one or more wallets without storing any information on the site. You keep your keys and your privacy but can use the site to send and receive ERC-compliant tokens and currency.
This guide covers important site functions, from setting up a wallet to sending and receiving assets, accessing the on-site exchange and name service, and using a Ledger Nano S hardware wallet with the site.
The company was created as a combined effort of financial professionals and experts in web-commerce with the goal of perfecting the online experience for retail traders.

82% of retail investor accounts lose money when trading CFDs with this provider. You should consider whether you can afford to take the high risk of losing your money
Plus500 is a FTSE 250 listed brokerage providing online trading services in CFDs, across 2,000+ securities and multiple asset classes.
Don’t invest unless you’re prepared to lose all the money you invest. This is a high-risk investment and you should not expect to be protected if something goes wrong. Take 2 mins to learn more
Creating a Wallet
Creating a new MyEtherWallet wallet can be confusing because the site doesn’t have internal user accounts. You can’t sign up with an email address and a password.
Follow these steps carefully:
1. Go to myetherwallet.com, where the default page is Create New Wallet. Enter a mnemonic phrase or very strong password to use for your new wallet: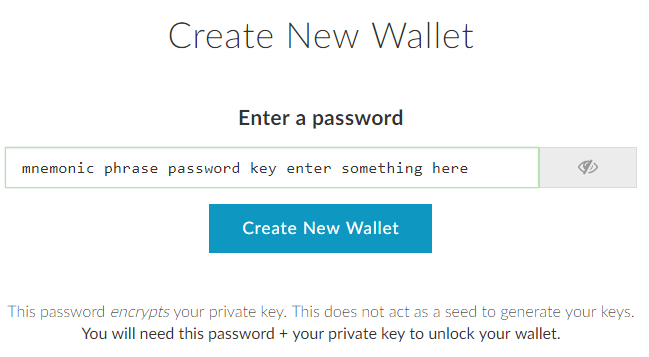
2. Download your keystore file. The keystore is an encrypted version of your private keys that you can use to access your wallet, so keep it somewhere very safe!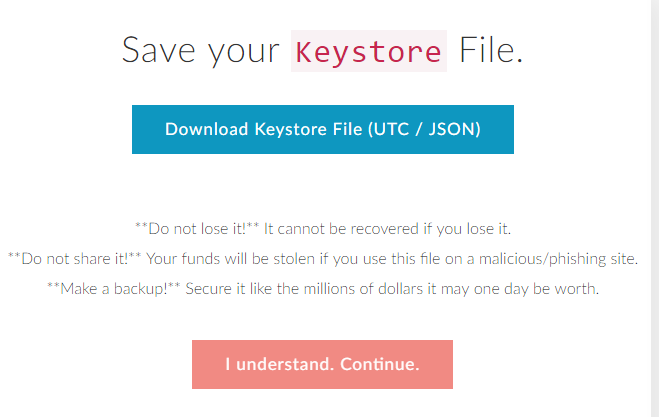
3. Hit I understand. Continue. to move on to your private key. Your private key is the unencrypted version of the information in the keystore file, so keep it offline, out of reach of hackers and malicious individuals. To be really safe, use the Print Paper Wallet option instead of keeping your private key on any device.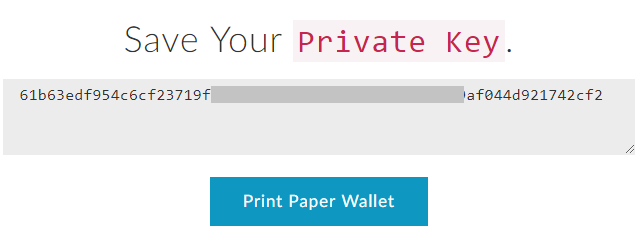
4. Choose how you would like to unlock your wallet to see the public key. You can choose a different method each time you visit.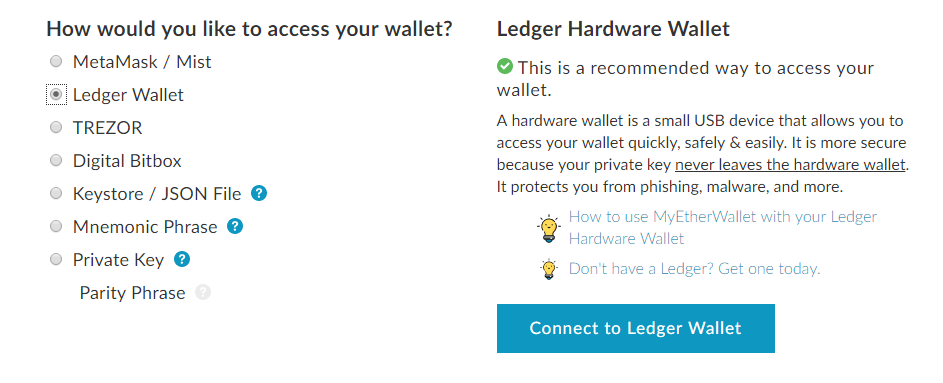
5. Once unlocked, your wallet information appears further down the page: scroll to see your public address, account balance, transaction history, token balances and QR code for easy scanning.
Receiving and Sending
MyEtherWallet takes advantage of the public ledger inherent to blockchain design to make management as simple as possible.
To receive ether and ERC20-compliant assets, simply send them to your wallet’s public address. As with any crypto wallet, you don’t need to connect to the site or use any passwords to receive assets.
To send currency or assets, follow these steps:
1. Go to myetherwallet.com and choose Send Ether & Tokens from the menu.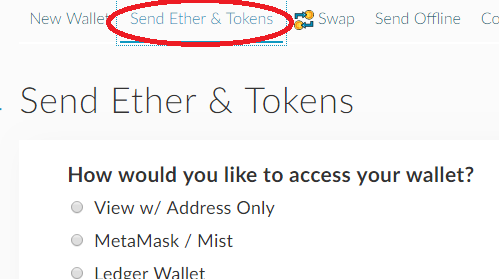
2. Unlock your wallet.
Enter the destination wallet address and amount to send. Your wallet stats are shown on the right (or further down on small screens).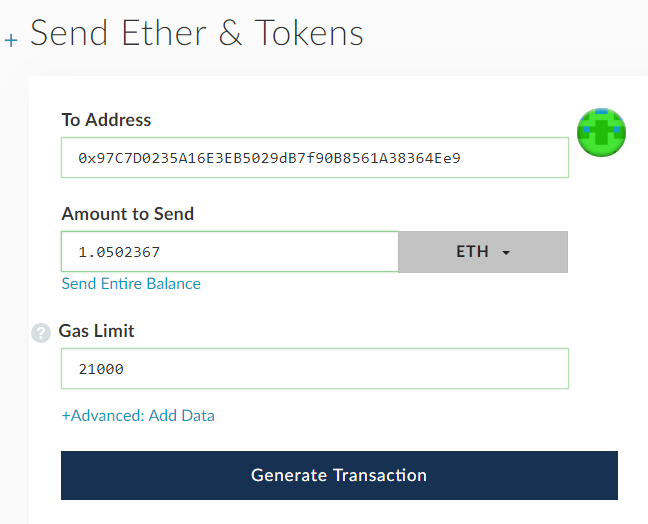 4. To send non-currency ERC20 assets, click the grey ETH dropdown and select from your list of available tokens.
5. Click Generate Transaction, then Send Transaction to send. You’ll see a popup with all the details and a final Yes, I am sure! confirmation.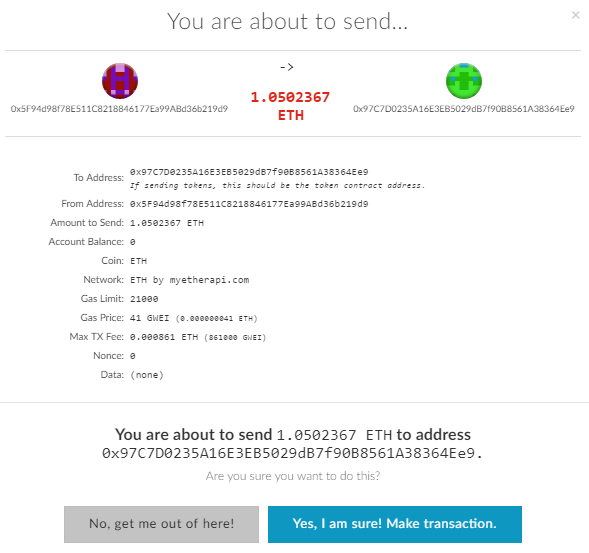
Sending Offline
For the security-conscious Ethereum user, MyEtherWallet features an offline send that keeps your private key completely safe by never transmitting it.
You can perform an offline send on a single device by toggling your network connection on and off, but it’s better to load the same page on two devices, then take one completely offline throughout the process.
1. Go to myetherwallet.com and choose Send Offline from the menu. Load the page on your offline computer, as well.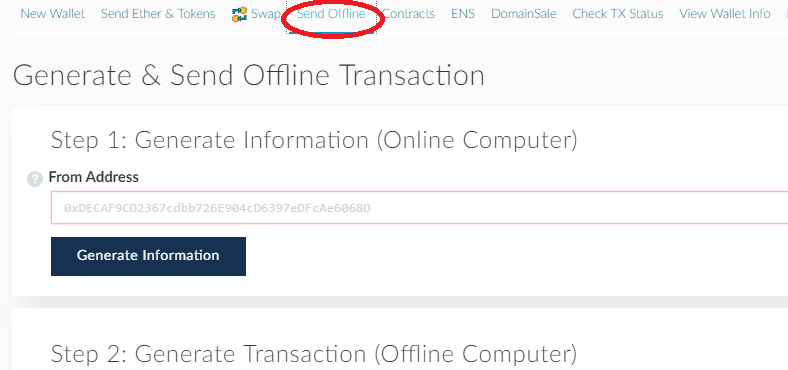 2. Enter the wallet address from which you’re sending and Generate Information to get a gas price and a nonce.
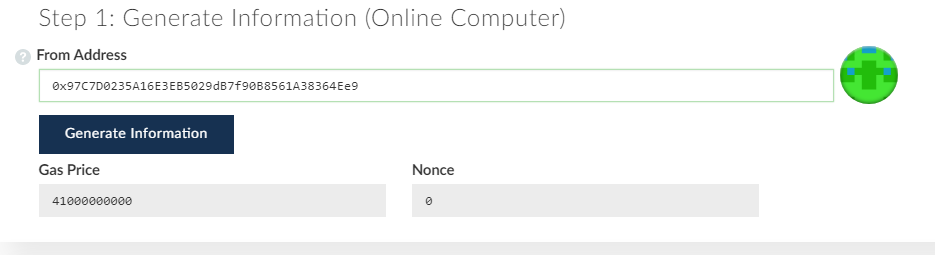 3. Go offline or switch to your offline device. Fill in the transaction data in the Step 2 section of the page.
As before, you can send tokens by clicking the ETH dropdown and selecting an asset (the list includes them all, regardless of whether you own any).
If you’re sending currency (not a contract), leave the gas limit at 21,000 – increasing it won’t make the transaction quicker!
4. Double-check that you’re offline before unlocking your wallet. Once your wallet’s unlocked, you’ll see a Generate Transaction button.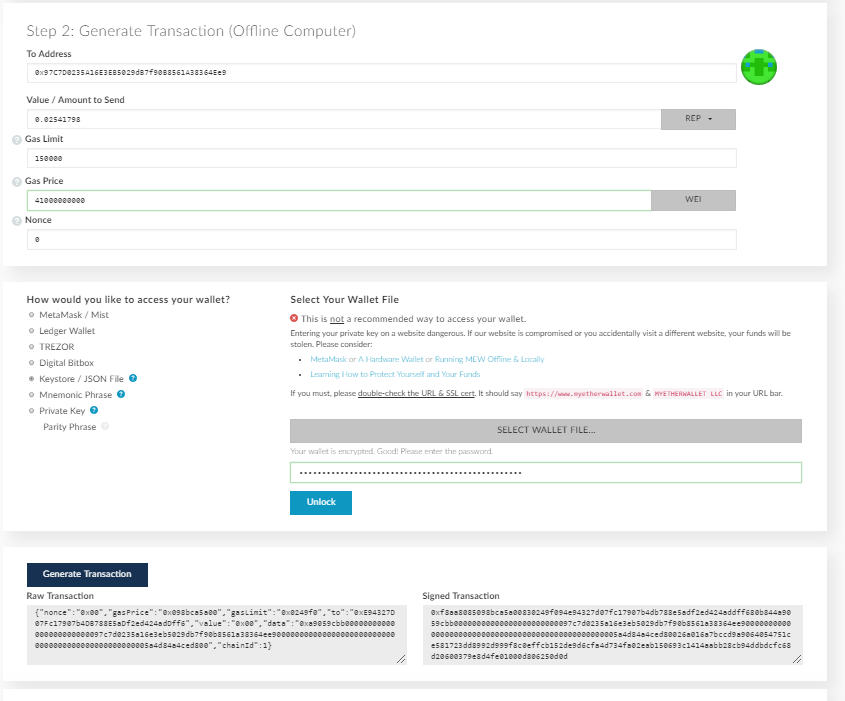 5. Copy the signed transaction from the offline computer to your online computer and use Send Transaction to pop up the confirmation dialog. Hit Yes, I am sure! to complete the transaction.
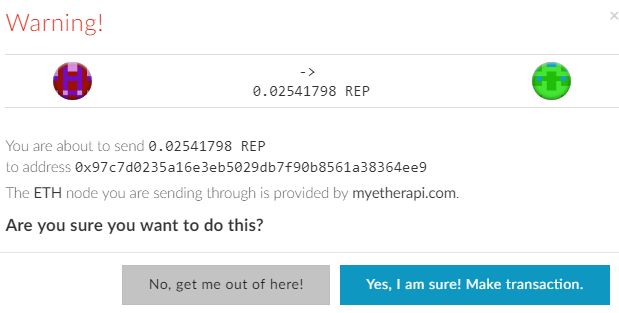
Using a Ledger Hardware Wallet
MyEtherWallet has native browser support for the Ledger Nano S and Ledger Blue hardware wallets, as long as you’re using either Chrome or Opera.
To set up your Ledger wallet:
- Go to myetherwallet.com in your browser and select the Send Ether & Tokens menu item.
- Plug in your Ledger device and select the Ethereum app (on your Ledger).
3. On a Nano S, right-button scroll to Settings, double-button select, right-button scroll to Browser Support, double-button select, then double-button select YES to enable support.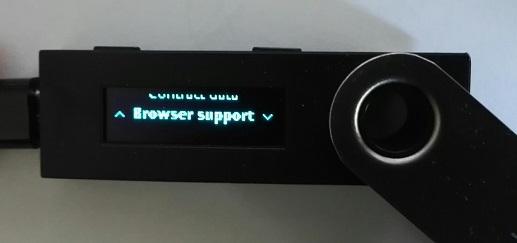 image source: ledgerwallet.com
4. On a Blue, tap the top-left menu, tap Browser Support so the slider goes green.
5. Back on myetherwallet.com, choose the Ledger Wallet option, followed by Connect to Ledger Wallet.6. You’ll see a list of HD derivation paths pop up, each with its own list of addresses. Choose the appropriate combination to access each of your Ethereum wallets stored on the device.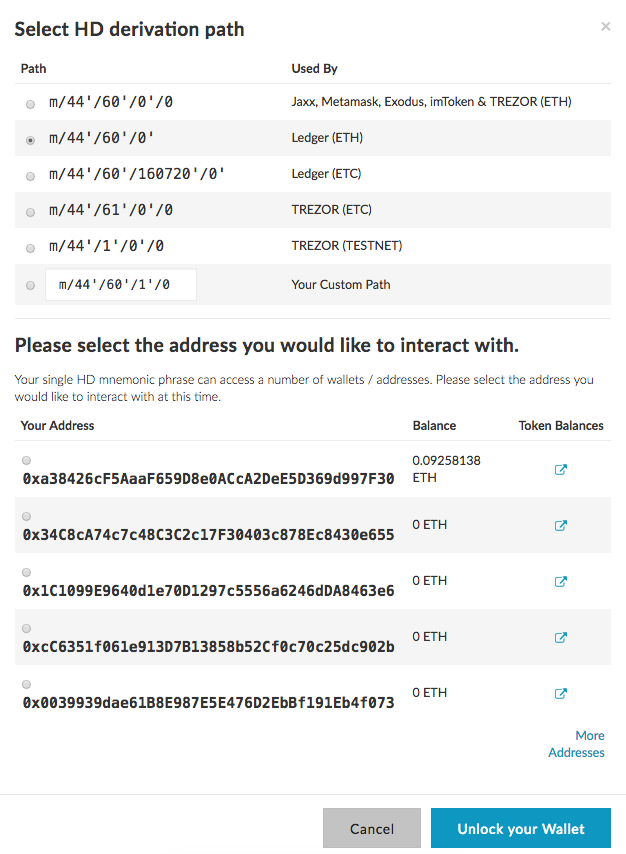 7. And that’s it! You can now send and receive ether and tokens from and to your Ledger device.
As you should expect, you’ll still have to go through the normal Ledger security processes to send assets from your hardware wallet. Your private keys never leave the device and only public information is sent to the site, for completely secure transactions.
Swapping Assets
The Swap option accesses a mini-exchange for swapping Ethereum for Bitcoin or Augur (REP), and Bitcoin for Ethereum or Augur.
If you’re swapping Bitcoin to an ERC20 asset, make sure your Bitcoin wallet is ready: you only get 10 minutes to send funds!
1. Select the Swap option, check current exchange rates, then choose which assets to swap and enter the amount to send or receive. Select Let’s do this!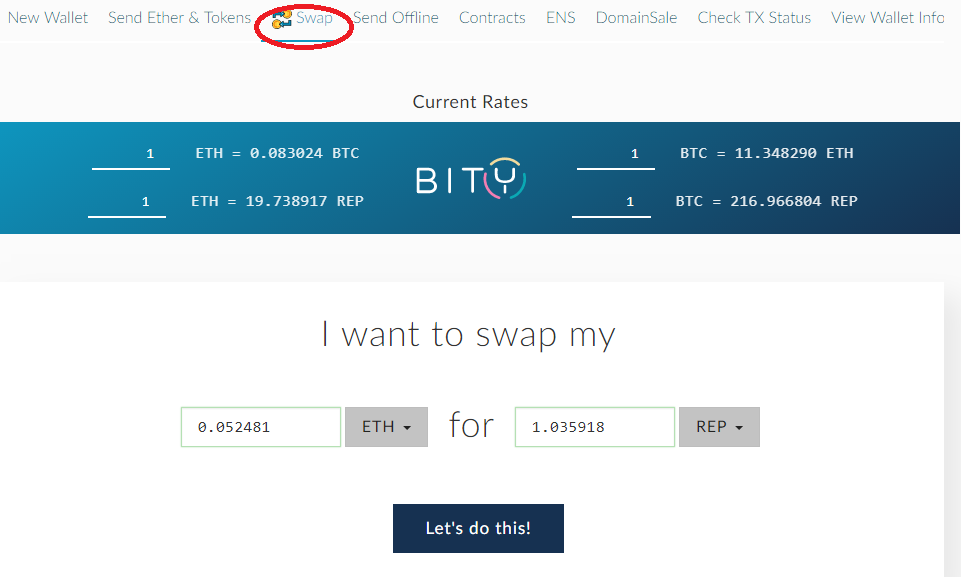 2. Enter the receiving address and select Start swap. Remember that ETH and REP can go to any ERC20-compliant wallet address but BTC must go to a Bitcoin wallet.
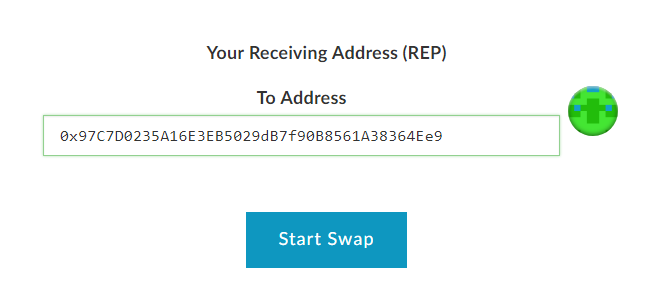 3. You get 10 minutes to send your funds for processing.
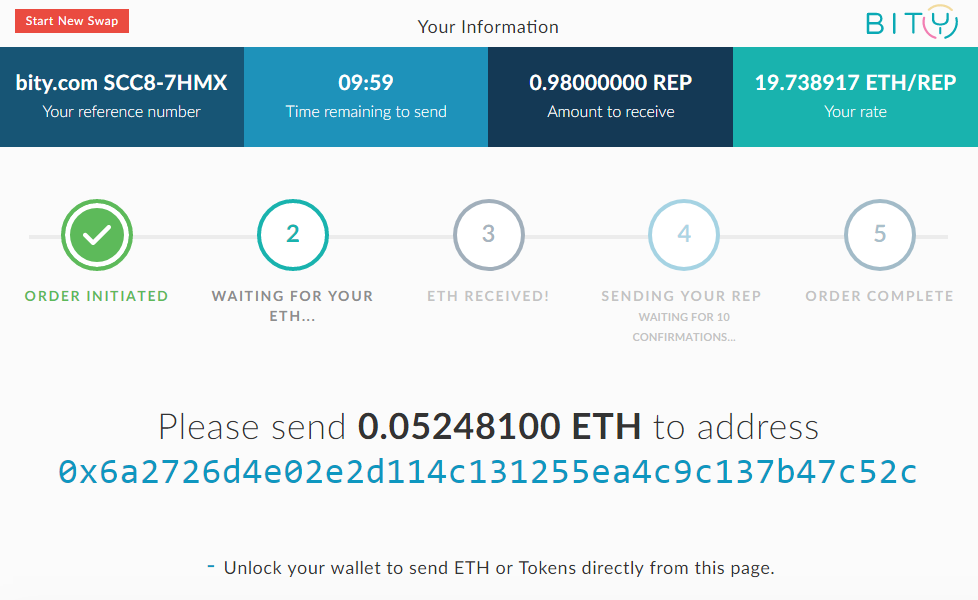
- You can scroll down to unlock a wallet and send ETH or REP direct from the page. The unlock process works for hardware wallets, too.
- The site remembers your swap for the full 10 minutes, so leaving and coming back shows the same request. There’s a Start New Swap button in the top left if you change your mind.
Smart Contracts
Ethereum’s game-changing feature is smart contracts, the power behind the majority of current ICOs and a growing number of DAPPs.
MyEtherWallet allows you to interact with existing smart contracts, or to deploy your own. Smart contracts are too complex for this short guide, but the site has excellent support information.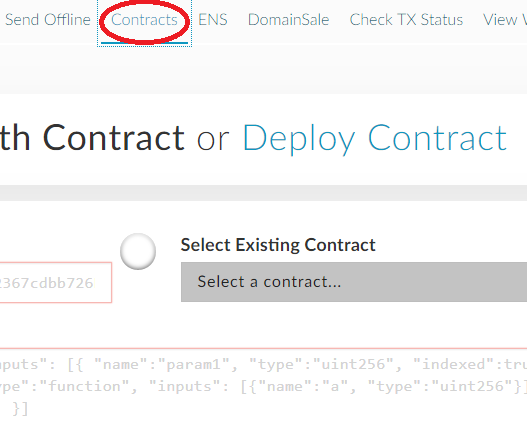
Ethereum Name Service
For serious or frequent Ethereum users, MyEtherWallet offers unique addresses. Using the Ethereum Name Service (ENS), you can buy a name for your public ETH address.
So, for example, you could purchase and send all future transactions to johndoe.eth instead of using your 0x public wallet address. Use the ENS option on the site to check whether the name you want is available and to make a bid for it. You’ll need some ETH in a wallet to pay for your name.